Nearly one in three American pet owners adds a security camera to their smart home setup, aiming for peace of mind and clearer connections with their pets while away. As work schedules shift and daily routines change, keeping an eye on furry companions helps reduce separation anxiety and supports a safer home environment. This step-by-step guide shows practical strategies that maximize both pet monitoring and overall household security.
Table of Contents
- Step 1: Assess Placement Locations For Optimal Viewing
- Step 2: Prepare Camera And Home Wi-Fi For Setup
- Step 3: Install And Mount The Security Camera Securely
- Step 4: Connect Device To Mobile App And Configure Settings
- Step 5: Test Video Quality And Adjust For Full Coverage
Quick Summary
| Key Insight | Explanation |
|---|---|
| 1. Optimal Camera Height | Mount security cameras 7-9 feet high for better visibility and to prevent tampering. |
| 2. Test Placement Before Mounting | Use painter’s tape to try out camera angles and ensure ideal coverage before permanent installation. |
| 3. Ensure Strong Wi-Fi Connection | Place cameras close to Wi-Fi routers to maintain stable streaming and monitoring capabilities. |
| 4. Utilize Advanced Features | Take advantage of motion detection, two-way audio, and night vision to enhance monitoring effectiveness. |
| 5. Regularly Test Video Quality | Check camera performance at different times to confirm clarity and adjust positioning as needed. |
Step 1: Assess Placement Locations for Optimal Viewing
Successfully installing a pet security camera requires strategic placement that maximizes your viewing capabilities while ensuring comprehensive home coverage. Understanding where and how to position your camera will dramatically improve your ability to monitor your furry friend effectively.
When assessing potential locations, start by identifying areas where your pet spends most of their time. This typically includes their favorite lounging spots like living room couches, pet beds, or near windows. Security camera placement experts recommend positioning cameras at strategic vantage points that provide clear lines of sight without obstructions. Height matters significantly: mounting cameras approximately 7-9 feet above ground level offers the best wide-angle view while preventing potential tampering.
Consider your home’s layout and potential signal strength when selecting mounting locations. Strategic positioning near Wi-Fi routers ensures stable connectivity for uninterrupted monitoring. Avoid placing cameras directly facing bright windows or light sources that could create glare or washout video quality. Instead, aim for neutral backgrounds that provide clear contrast and make your pet easily visible.
Pro Tip: Test your camera’s view before permanent mounting by using painter’s tape to temporarily position the device and preview the exact angle and coverage area.
Here’s a quick reference comparing key considerations for placing pet security cameras:
| Placement Factor | Why It Matters | Practical Tip |
|---|---|---|
| Viewing Angle | Ensures wide coverage | Mount 7-9 feet above ground |
| Obstruction Avoidance | Prevents blind spots | Avoid furniture and large decor |
| Lighting Conditions | Reduces glare and washout | Do not point at windows or lights |
| Wi-Fi Signal Strength | Supports stable video streaming | Position near a strong router signal |
| Mounting Security | Prevents accidental tampering | Test with tape before permanent setup |
Step 2: Prepare Camera and Home Wi-Fi for Setup
Connecting your pet security camera requires a bit of technical preparation to ensure smooth and reliable performance. Your goal in this step is to create a stable network environment that will support uninterrupted monitoring of your furry friend.
Start by checking your home Wi-Fi network strength and compatibility. Most pet cameras require a 2.4 GHz network connection with a strong signal near your planned camera location. Verify your router settings and consider repositioning your router if the signal seems weak in the area where you want to install the camera. Download the manufacturer’s companion app to your smartphone and ensure it is updated to the latest version before beginning the setup process.
Next gather all necessary equipment including your camera, mounting hardware, power adapter and any included cables. Charge or install batteries for wireless cameras and confirm you have a nearby electrical outlet if using a wired power supply. Review the camera’s specific connectivity requirements carefully and have your home Wi-Fi password readily available during the installation process.
Pro Tip: Create a dedicated Wi-Fi network for your smart home devices to improve overall network security and reduce potential interference with other home electronics.
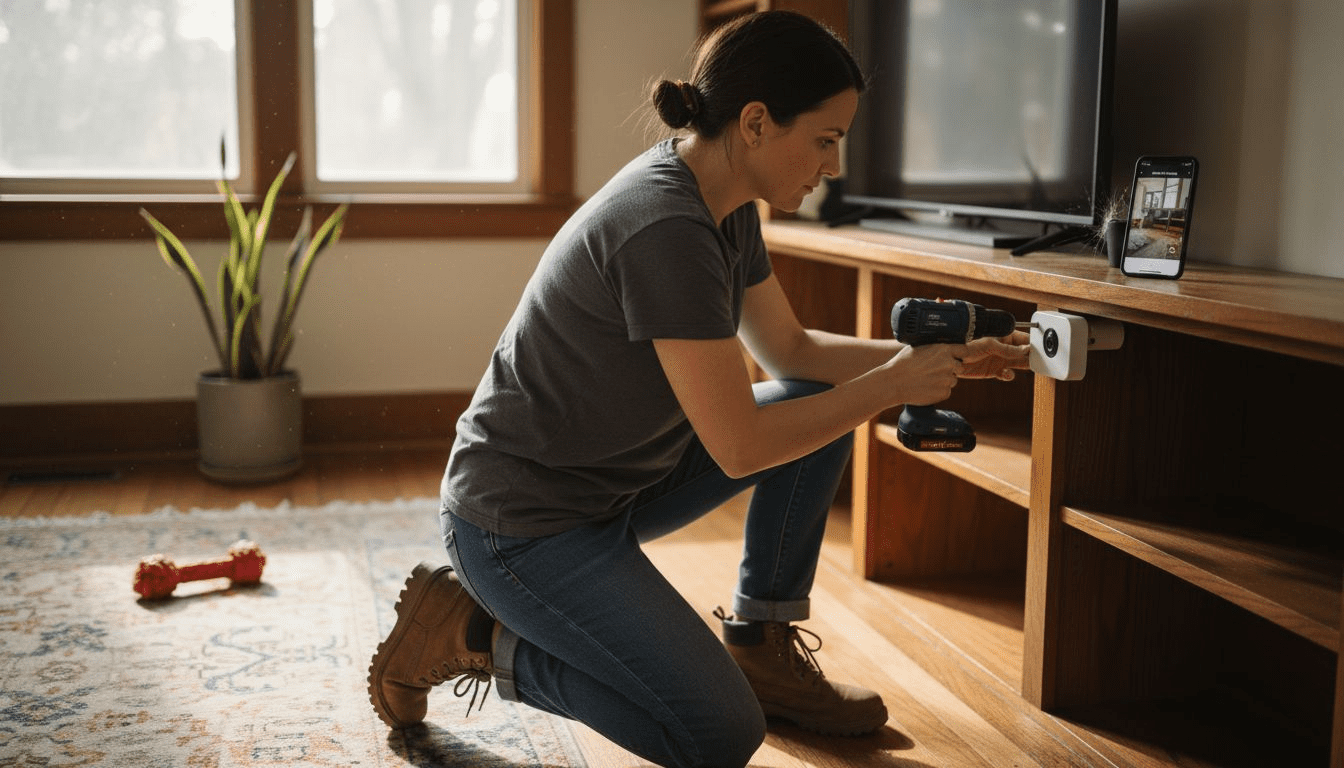
Step 3: Install and Mount the Security Camera Securely
Mounting your pet security camera requires precision and careful planning to ensure optimal monitoring and long-term stability. Your goal is to create a secure installation that provides clear visibility while protecting the camera from potential damage or tampering.
Proper security camera installation involves selecting the right mounting surface and using appropriate tools and techniques. Begin by gathering essential tools like a power drill, level, pencil, mounting bracket, and appropriate wall anchors. For indoor cameras, choose walls made of drywall or solid wood that can support the camera’s weight. Locate wall studs whenever possible for the most secure mounting solution. If mounting on drywall without a stud, use heavy-duty wall anchors designed to support electronic devices.
DIY security camera installation requires careful attention to detail and precise positioning. After selecting your mounting location, use a level to mark exact drilling points and ensure your camera will be perfectly horizontal. Drill pilot holes carefully to prevent wall damage and insert wall anchors if needed. Attach the mounting bracket securely, then connect your camera and adjust its angle to capture the desired viewing area. Double check all connections and ensure the camera is firmly attached before finalizing your setup.
Pro Tip: Always test the camera’s mount by gently pulling and wiggling it after installation to confirm it can withstand potential pet interactions or accidental bumps.
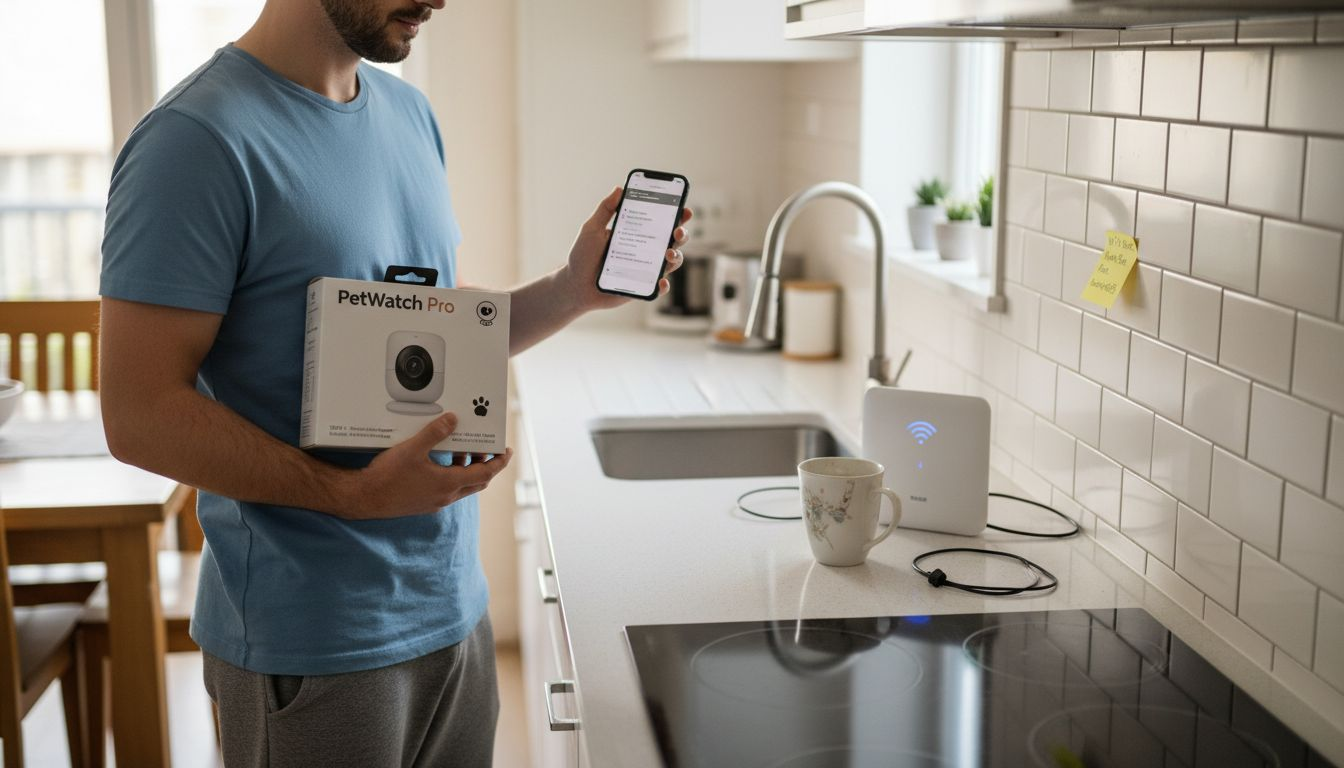
Step 4: Connect Device to Mobile App and Configure Settings
Connecting your pet security camera to its mobile app is the crucial final step that transforms your hardware into a smart monitoring system. This process will enable remote viewing, notifications, and advanced features that help you stay connected with your pet.
Open the manufacturer’s companion app on your smartphone and create an account if you have not already done so. Most pet camera apps will guide you through a step-by-step pairing process that involves scanning a QR code or serial number located on your camera. Ensure your smartphone is connected to the same Wi-Fi network as your camera during this process. Follow the on screen prompts carefully, which typically involve pressing a sync button on the camera or entering a unique device code to establish the connection.
Once connected, customize your camera settings to optimize pet monitoring. Configure motion detection zones to focus on specific areas like your pet’s favorite lounging spots or entry points. Set up notification preferences to receive alerts when your camera detects movement or sound. Explore additional features like two way audio communication or treat dispensing settings if your camera model includes these capabilities. Take time to adjust video quality, night vision settings, and storage preferences to match your specific monitoring needs.
Pro Tip: Create a unique name for your camera in the app that helps you quickly identify its location and purpose in your home.
Step 5: Test Video Quality and Adjust for Full Coverage
Evaluating and fine tuning your pet security camera’s video performance is essential to ensure you capture every important moment and movement in your pet’s environment. This critical step transforms your initial setup into a reliable monitoring system that provides clear and comprehensive coverage.

Begin by testing your camera during different times of day to assess video quality across various lighting conditions. Use the mobile app to view live footage and check for clarity, color accuracy, and overall visibility. Pay special attention to areas where your pet typically spends time such as beds, lounging spots, and play zones. Adjust camera angle and zoom settings to eliminate any blind spots or areas with poor resolution. If your camera offers multiple video quality settings, experiment with different resolutions to find the optimal balance between image clarity and storage requirements.
Utilize your camera’s advanced features like night vision and motion detection to verify comprehensive monitoring capabilities. Walk through the areas your camera covers and confirm that movement triggers are working correctly. Check that notifications are being sent promptly and that video clips are recording as expected. If you notice any gaps in coverage or inconsistent performance, consider repositioning the camera or adding additional devices to create a more comprehensive monitoring setup.
Pro Tip: Perform a full system test by simulating your pet’s typical daily activities to ensure your camera captures the most important moments reliably.
The table below summarizes common pet security camera features and their impacts:
| Feature | Function | Benefit for Pet Owners |
|---|---|---|
| Motion Detection | Detects pet movement | Receive instant alerts of activity |
| Two-Way Audio | Allows remote communication | Calm pets or issue real-time commands |
| Treat Dispenser | Dispenses pet treats on command | Reward and entertain pets remotely |
| Night Vision | Monitors in low-light conditions | Ensures 24/7 visibility |
| Mobile Notifications | Sends alerts to your phone | Immediate status updates anywhere |
Enhance Your Home Monitoring with Expert Insights and Trusted Solutions
Installing a pet security camera brings peace of mind by allowing you to watch over your furry friend even when you are away. This article highlights common challenges such as choosing the perfect placement location, ensuring strong Wi-Fi connectivity, and securing the device for comprehensive and reliable monitoring. If you want to master concepts like motion detection zones, two-way audio, and night vision that enhance your pet’s safety and wellbeing, gaining deeper knowledge is essential.
At ModernPetTech, we specialize in breaking down these complex features and helping pet owners find cameras that truly fit their needs. Explore our extensive Pet Cameras section to compare top models with detailed insights into treat dispensing, video quality, and smart alerts. For step-by-step user guidance and comparative analysis, our Guides & Comparisons page is a perfect resource.
Ready to take control of your pet’s security with confidence? Visit ModernPetTech now to discover smart monitoring devices that turn your home into a safe and interactive environment for your beloved companion.
Frequently Asked Questions
How do I find the best placement for my pet security camera?
Position your pet security camera where your pet spends most of their time, like their lounging spots or near windows. Aim to mount the camera about 7-9 feet off the ground for optimal viewing and to avoid obstructions.
What should I check before setting up my pet security camera?
Before setup, verify your home Wi-Fi network’s strength and compatibility, ensuring it operates on a 2.4 GHz connection. Confirm that you have the necessary equipment ready, including the camera, mounting hardware, and power sources for a smooth installation process.
How can I securely mount my pet security camera?
To securely mount your camera, use a power drill, level, and appropriate wall anchors based on your mounting surface. Attaching to a wall stud or using heavy-duty anchors will provide a stable setup that withstands potential bumps from pets.
What settings should I configure in the mobile app after installation?
After installation, customize your camera settings by adjusting motion detection zones, notification preferences, and video quality. Review features like two-way audio and treat dispensing to enhance your pet monitoring experience.
How can I test my pet security camera’s coverage?
To test your camera’s coverage, evaluate the video quality at various times of day and check for blind spots. Walk through the areas covered by the camera to ensure motion detection is functioning correctly and notifications are received promptly.
What should I do if I notice gaps in the camera’s coverage?
If you notice coverage gaps, consider repositioning the camera to achieve a better angle or adding additional cameras in those areas. Aim to optimize your setup to ensure comprehensive monitoring of your pet’s environment.
Recommended
- Pet Camera Reviews & Smart Pet Tech Guides | ModernPetTech
- budget pet camera under $50 | cheap pet cameras that work
- Pet Cameras: The Ultimate Guide for Pet Owners in 2025 – ModernPetTech: Treat-Dispensing Pet Camera Reviews
- Best Pet Camera 2025: Monitor Your Pets Anytime, Anywhere
1 thought on “Pet Security Camera Installation Guide for Safe Monitoring”